In this article, I will cover how to configure Google Cloud Identity SAML SSO for administrator authentication on the Palo Alto Networks platform.
- Administrative Access
- Authentication for administrators
- SAML role-based access mapping via “Admin Role Attribute”
- SAML SSO for administrator access
Configure Google Cloud Identity SAML IDP
Prerequisites:
- Enable Google Cloud Identity (free or premium)
- In your Goole admin console, navigate to “Billing”
- Enable the Cloud Identity service of choice
Assumptions:
- For simplification, this guide assumes you are using a FQDN for access to the Palo Alto Networks management interface.
- The steps below outline the entire process as if you have not downloaded Google’s SAML metadata or certificate. If you have already completed the integrations for Globalprotect or Captive portal, you can skip these steps.
Step 1: Create the SAML Application
- In your Google Admin Panel, navigate to “Apps” >> “SAML Apps”
- You will create a new custom application for management access
- Select the yellow + icon in the bottom-right of your screen to create a new SAML application

- Step 1 of 5: In the popup window, choose “SETUP MY OWN CUSTOM APP”. Until a pre-defined application is
created for management access, we will need to customize our own.
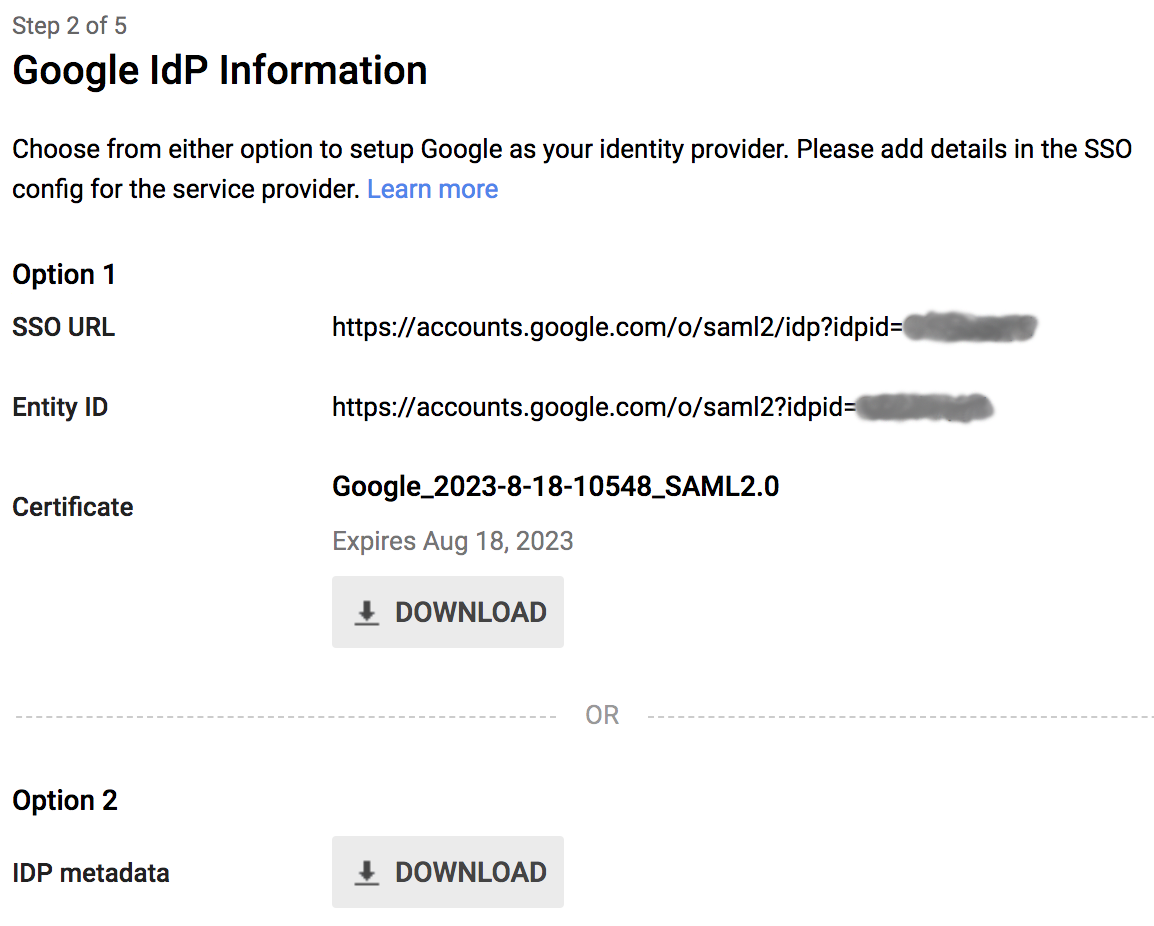
- Step 2 of 5: In this window, you will need to download both your IDP’s certificate as well as the IDP
metadata. The IDP metadata is the most critical piece, as this will enable us to work around the firewall’s
limitation of importing a self-signed certificate with matching fields. We will revisit this in detail later on.
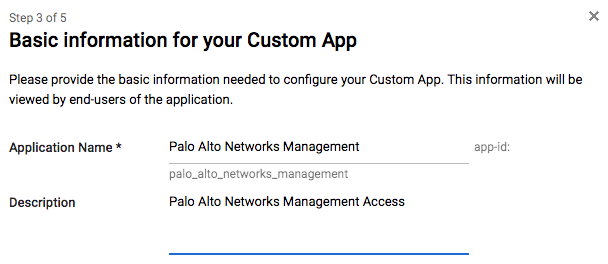
- Step 3 of 5: Enter a name and description for the application, and optionally upload a logo. All of these options
are only locally-significant, so whatever we set here will not affect the overall configuration.
- Step 4 of 5: Setup the Service Provider Information:
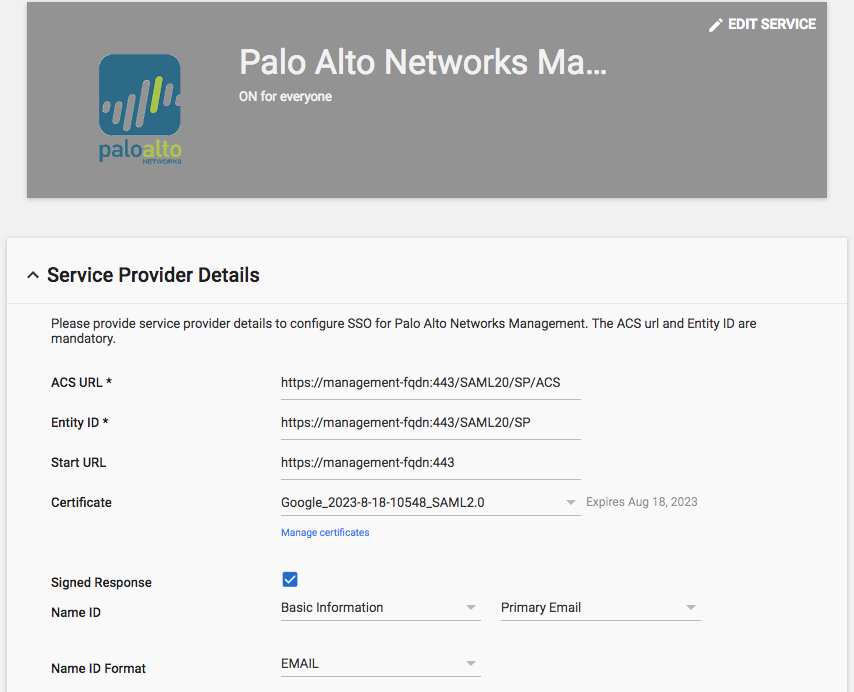
- ACS URL: https://<your_management_fqdn_or_ip>:443/SAML20/SP/ACS
- Entity ID: https://<your_management_fqdn_or_ip>:443/SAML20/SP
- Start URL: https://<your_management_fqdn_or_ip>:443
- Signed Response: YES
- Signed responses are a critical piece for authentication. The Palo Alto Networks Firewall expects signed responses, as a result, this option must be enabled for authentication to succeed.
- Name ID: Basic Information – Primary Email
- Name ID Format: Email
- In testing, this option also worked when set to “Unspecified”. For the purpose of normalizing user-ID information, “Email” was selected.
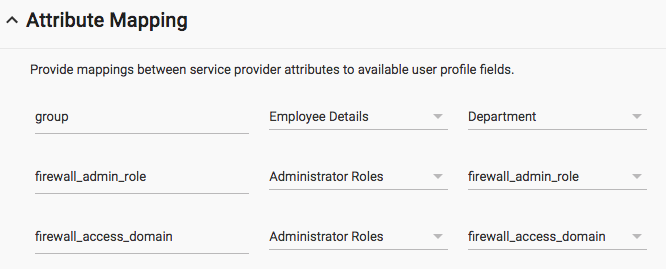
- Step 5 of 5: No additional attributes are necessary, but mapping additional attributes can enhance SAML data.
- Update: the Palo Alto Networks Firewall can now take advantage of additional options returned here (such as Group,
first and/or last name, user role). As a result, mapping additional Google Cloud Identity attributes allows you to
pass information from your Google domain back to the device. This can be useful for grabbing group information and/or
device admin privileges straight from user attributes stored in Google. We can map these attributes later on when we
create our authentication profile.
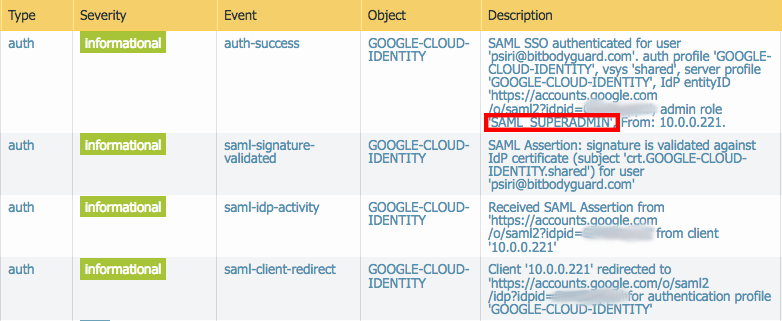
- Result of mapped attributes in authentication logs:
- Update: the Palo Alto Networks Firewall can now take advantage of additional options returned here (such as Group,
first and/or last name, user role). As a result, mapping additional Google Cloud Identity attributes allows you to
pass information from your Google domain back to the device. This can be useful for grabbing group information and/or
device admin privileges straight from user attributes stored in Google. We can map these attributes later on when we
create our authentication profile.
- Select the yellow + icon in the bottom-right of your screen to create a new SAML application
Step 2: Enable the SAML application
- In your Google Admin console, navigate to Apps >> SAML Apps
- On the far-right of your new application, click the three vertical dots and select either “ON for everyone” or “ON for some”. For the purposes for this integration, I have selected everyone to enable the application organization-wide.
- When prompted for confirmation, select “TURN ON FOR EVERYONE” to confirm
Step 3: Create Custom Attributes for your organization (if they do not already exist)
- In your Google Admin console, navigate to “Users”
- In the top-right corner, select “Manage Custom Attributes”
- Choose “Add a custom attribute” to create a new attribute for firewall access. In this example, I
created a new category called “Administrator Roles” in order to separate these from pre-existing
fields
- Add a custom field for your firewall admin role. The name is arbitrary, but MUST match what is configured on your Palo Alto Networks Authentication Profile, and in the “Attribute Mapping” section of your SAML SP profile. For this example, I have called it “firewall_admin_role”.
- Set type to “text”, choose the appropriate visibility, and select “Single Value”
- Add a custom field for your firewall access domain. The name is arbitrary, but MUST match what is configured on your Palo Alto Networks Authentication Profile, and in the “Attribute Mapping” section of your SAML SP profile. For this example, I have called it “firewall_admin_role”
- Firewall access domains (if configured) control which vsys the administrator will be given privileges to
- Set type to “text”, choose the appropriate visibility, and select “Single Value”
- Add a custom field for your firewall admin role. The name is arbitrary, but MUST match what is configured on your Palo Alto Networks Authentication Profile, and in the “Attribute Mapping” section of your SAML SP profile. For this example, I have called it “firewall_admin_role”.
- Save your changes
Step 4: Map Custom Attributes to your firewall administrators’ user accounts
- In your Google Admin console, navigate to “Users”
- Select the user you wish to add firewall administrative privileges to
- Select the “User Information” section within the user’s profile
- You will now see a new attribute section corresponding to the custom attributes we just created, this is where we
will need to add our firewall admin role
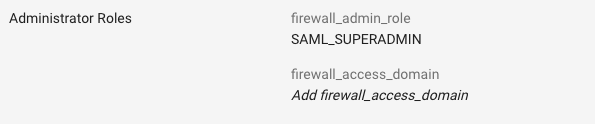
- Note: The value you input in the user specific section will define the user’s role on the firewall. This can
be one of the pre-defined roles (Superuser, Superreader, auditadmin, cryptoadmin, securityadmin, etc), or a custom
role your define on the firewall Device >> Admin Roles (example below). For this example, I have demonstrated
how to map a custom role named “SAML_SUPERADMIN”.

Configure the Palo Alto Networks Firewall
Step 1: Setup the SAML Identity Provider Profile:
- In your firewall’s management GUI (or Panorama), navigate to Device >> Server Profiles >> SAML Identity Provider
- Import the SAML IDP metadata downloaded from your Google Admin Console
- Although you could manually enter many of the IDP metadata fields, there is currently a limitation around importing a cert with identical CN and issuer fields. We will address this shortly. Google is creating a self-signed CA for signing SAML requests, and the firewall will not import them. Long story short: You will not be able to import the certificate until this is patched.
- Give your profile a descriptive name
- Do not select “Administrator use only” option.
- Ensure “Validate Identity Provider Certificate” is enabled
- Click “OK” to save the SAML IDP profile
Step 2: Create a Workaround for Google’s CA Certificate:
- In your firewall’s management GUI (or Panorama), navigate to Device >> Certificate Management >> Certificates
- You will now notice that during the SAML IDP metadata import process, your Google IDP certificate has been imported. The problem here though is that the signing certificate should actually be a self-signed CA for signing SAML requests, but the firewall will not import any certificate with identical CN and issuer fields. Long story short: We will need to manually change the certificate to a CA before we can proceed.
- In your firewall’s management GUI (or Panorama), navigate to Device >> Setup >> Operations
- Save your progress so far. Select “Save named configuration snapshot” and choose a name.
- Export the saved config in XML. Select “Export named configuration snapshot”, choosing the saved snapshot just created.
- Open the XML configuration in any text editor. We are going to set the certificate’s CA flag, so that the certificate will properly become a CA upon import.
- Find the certificate within your firewall’s XML configuration. Generally certificates are near the top of the XML config, and should not take long to locate. The field we are concerned with specifically is “<ca>no</ca>”. Modify this line to “<ca>yes</ca>”
- Save the modified XML config.
<entry name=”crt.GOOGLE-CLOUD-IDENTITY.shared”>
<issuer>/O=Google Inc./L=Mountain View/CN=Google/OU=Google For Work/C=US/ST=California</issuer>
<common-name>Google_Cloud_ID</common-name>
<ca>yes</ca>
<subject>/O=Google Inc./L=Mountain View/CN=Google/OU=Google For Work/C=US/ST=California</subject>
<public-key>—–BEGIN CERTIFICATE—–
…<<<content omitted>>>
…
—–END CERTIFICATE—–
</public-key>
<algorithm>RSA</algorithm>
</entry>
Step 3: Import the modified configuration and create a certificate profile:
- In your firewall’s management GUI (or Panorama), navigate to Device >> Setup >> Operations
- Import your modified XML configuration. Select “Import named configuration snapshot” and choose the modified XML file.
- Load the imported config. Select “Load named configuration snapshot”, choosing the modified XML config uploaded in the previous step.
- Navigate to Device >> Certificate Management >> Certificates, and verify that your Google IDP certificate now has the “CA” flag set

- Navigate to Device >> Certificate Management >> Certificate Profile
- Create a new certificate profile for your Google Cloud Identity SAML IDP. The sole purpose of this profile will be
signing SAML requests.

- Give the profile a descriptive name, such as “GOOGLE-CLOUD-IDENTITY”
- Leave all options at default
- Under “CA Certificates”, select the certificate we just made a CA
- Select “OK” to save the certificate profile
Step 4: Create an authentication profile for Google’s SAML IDP
- Navigate to Device >> Authentication Profile
- Select “Add” to create a new authentication profile
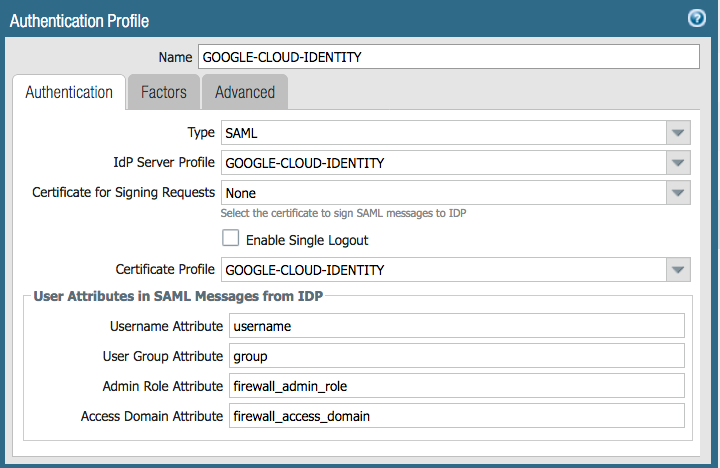
- Give your new authentication profile a descriptive name
- Under the “Type” field, select “SAML” from the dropdown menu
- Under the “IdP Server Profile” field, select the SAML identity provider profile created in step 1.
- Under the “Certificate for Signing Requests” field, select “None”
- Google does not require signed requests. Palo Alto does require signed responses.
- Under the “User Attributes in SAML Messages from IDP” section
- Leave the “Username Attribute” field as “username”
- No additional attributes are necessary, but mapping additional attributes can enhance SAML data.
- Update: the Palo Alto Networks Firewall can now take advantage of additional options returned here (such as Group, first and/or last name, user role). As a result, mapping additional Google Cloud Identity attributes allows you to pass information from your Google domain back to the device. This can be useful for grabbing group information and/or device admin privileges straight from user attributes stored in Google. We can map these attributes later on when we create our authentication profile.
- (Optional) map groups by entering “group” in the “User Group Attribute field”
- (MANDATORY) map the admin role created in the previous steps by entering “firewall_admin_role” in the “Admin Role Attribute” field.
- (Optional) map the access domain created in the previous steps by entering “firewall_access_domain” in the “Admin Domain Attribute” field.
- Note: by leaving this field blank (in user attributes) the user will be given access to all available access
domains.
- Note: by leaving this field blank (in user attributes) the user will be given access to all available access
domains.
- Result of mapped attributes in authentication logs:
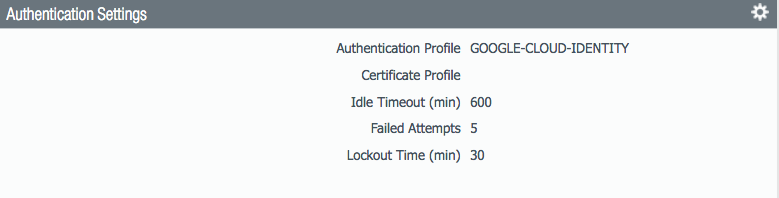
Step 5: Modify the Admin Authentication Settings
- Navigate to Device >> Setup >> Management >> Authentication Settings
- Select the Authentication Profile created in the previous steps
Step 6 (OPTIONAL): Create a custom Admin Role
- Navigate to Device >> Admin Roles
- Create a new Admin Role. The name MUST match what was set in the user-specific attributes of Google IDP
- Define the desired administrative access parameters
- For this example, I have demonstrated how to map a custom role named “SAML_SUPERADMIN”. We will get to
this step on the Palo Alto side later on.
Step 7: Commit the configuration
Step 8: Verify Administrator SAML Authentication and SSO
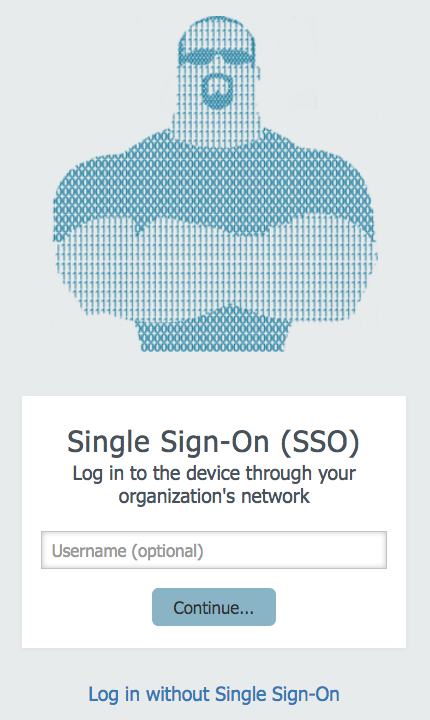
- Logout of the firewall admin GUI
- Your firewall login page should now have the option to “Use Single Sign-On”
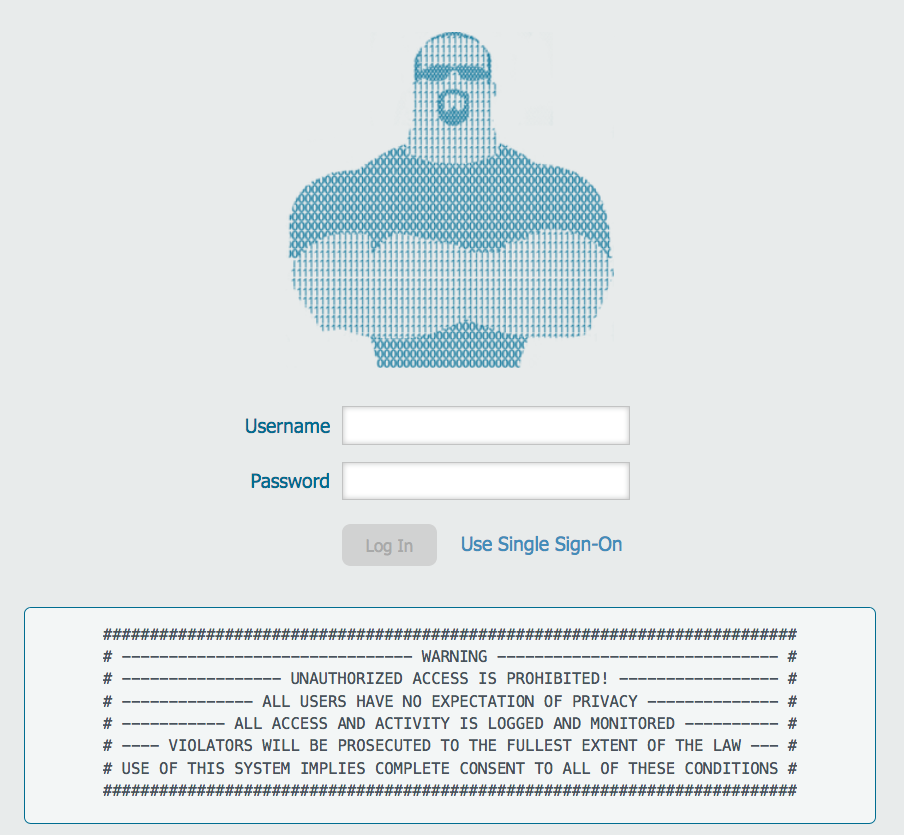
- Select the “Use Single Sign-On” option
- Click “Continue” or enter a username
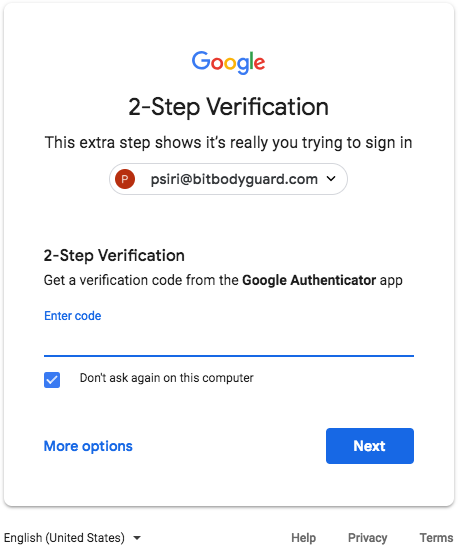
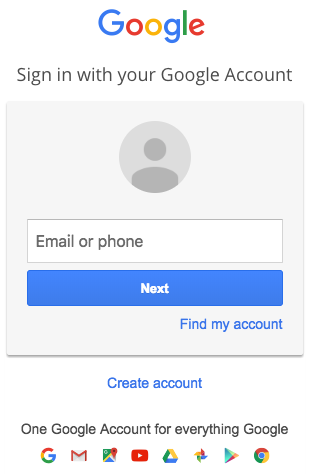
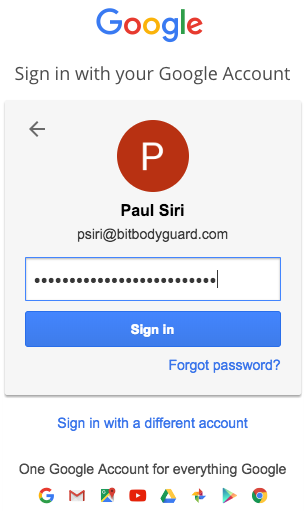
- You Should be redirected to sign-in with your Google IDP
- Depending on your organization’s settings, you may also be prompted for MFA
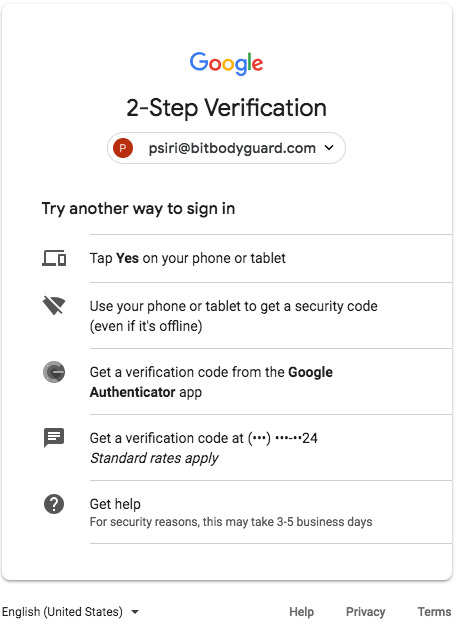
- Authentication Complete!